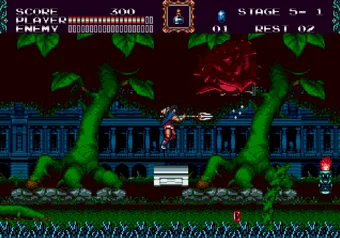
John or Eric: moves and routes
The basics are shared. A attacks, B jumps, and Down+A in midair drives your weapon straight down onto whatever is below. Past that, the moves differ, and so do some of the rooms you get to see.
John Morris and the whip swing
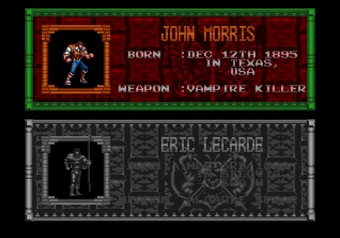
John has one special move, and it's a good one. Jump, then press Up+A: the Vampire Killer latches onto a ceiling block and swings him forward. Simon needed a ring to hang from. John uses ordinary blocks, so whenever a gap looks too wide to jump, look up. His whip also hits harder than Eric's spear, and fully powered up it becomes a flame whip.
How does Eric's Mega Jump work?
The game doesn't really explain it. Hold down, then press jump, Down+B, and Eric leaps about three times higher than normal. Eric's own path through several stages is built around that jump, so if a ledge looks out of reach, it probably isn't.
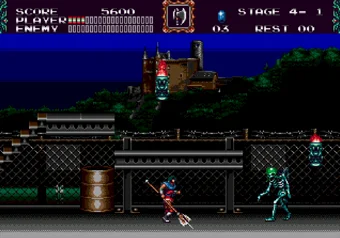
His other trick is the spinning lance, and it depends on timing. Hold A and press left or right while the spear is still extended, and Eric twirls the Alcarde Spear back and forth. He can also stab upward and diagonally by holding a direction as he attacks. Eric moves a little faster and reaches further, at the cost of slightly less damage per hit. For a first run, that reach makes him the more forgiving pick.
Where the routes split
Stage 3 is where it matters most. In the maze inside the Tower of Pisa, John goes right, while Eric keeps jumping up and only then heads right. The right-hand path is a death trap for Eric, since only the whip can swing across it, and John can't jump high enough to take Eric's way. In stage 5 the organ room splits them again: John goes through the door once the big eyeball lasers are dead, and Eric jumps the platforms above. Later in that stage Eric drops down through a room of spinning gears. Don't go all the way to the bottom, because that's a dead end. The real exit is in the middle.
Jewels, sub-weapons and the smart bomb
Jewels do the job hearts did in older Castlevania games: they are ammo for whatever you throw with C. A red jewel adds one, a blue jewel adds five, and nearly all of them sit inside candles, so whip every candle you pass. A normal throw costs one jewel.
Two other uses cost more. Hold up as you throw, Up+C, and the sub-weapon turns into a smart bomb for four jewels. Collect three weapon upgrades while carrying at least eight jewels, and the sub-weapon is temporarily replaced by an ultimate attack that costs eight. That's the case for hoarding: walking into a boss room with a full stock is worth more than every axe you could have wasted on bats along the way.
Which sub-weapon should you carry?
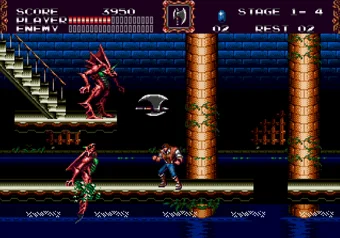
The axe goes up and comes down in an arc. It misses enemies at your own height more often than you'd like, but it's great for anything above you, and that includes Death, who spends much of his fight in the air. The boomerang flies straight and comes back, so a single throw can hit twice. Take it into the Pisa stairway in stage 3, where two skeletons are a real problem without it, and into the Versailles garden for the tree creature.
Holy water arcs like the axe and explodes where it lands. On its own it's weak. Grab it anyway in the last gear room of stage 4, because you'll need it against the gear boss waiting at the end of that stage.
Once your main weapon is fully powered up, all three change: three axes fly straight ahead, three boomerangs sweep forward in a circle, and holy water spirals across the screen. That spiral is the point where holy water finally earns its slot.
Everything else in candles and cracked walls is simpler. Meat restores half your life, the black orb makes you invulnerable for a short while, and the mirror hits every enemy on screen. The spell book has a random effect, sometimes a weapon upgrade. Cracked walls hide items and food, so hit every one you see.
Castle Proserpina: Death, Elizabeth and Dracula
Stage 6 starts messing with you before any boss shows up. When the bridge begins to explode, jump off it and get inside. In the mirror room, watch your feet and ignore the reflections. Right after it, the screen flips upside down and you fight knights that way. The first boss in the castle hallway dies after one hit, which is the last easy thing this stage gives you.
Death and his cards
Don't waste attacks on Death while he's still appearing, because nothing hurts him yet. Once he's fully there, cards spin around him. The scythe card and the reaper card both fire a fireball. The angel card gives you 12 pieces of meat, the best thing that can happen in this room. The other three send you into rematches: the bat card against the giant bat from stage 3, the fountain card against the stone giant from stage 2, and the gear card against the gear boss from stage 4.
Then Death fights for real. While he's in the air, throw axes at him and dodge his spinning blades. When he reaches the ground, be ready to jump or he'll slash you. The second time he lands he throws his scythe and pulls you toward him, so hit him a few times and then jump over it. His last attack is a spray of blades from midair. Along with Dracula, this is the hardest fight in the game.
Entering the stage 6 password strips your weapon level, your jewels and your sub-weapon, which is a bad way to meet Death. If you're playing online here, press Save before his room instead, and every retry starts with the weapon you actually earned.
How do you beat Elizabeth Bartley?
You can't hurt her until she turns into Medusa. In that form, duck when her fireballs come together, keep your distance from the fire breath, and time a jump over her tail, which reaches every spot in the room. When Medusa runs out of health, Elizabeth comes back and throws four to six orbs into the air. Count them, then hit her that many times. Get it wrong and she summons hunchbacks. Duck as she reappears, or her fireball catches you. It's a counting test more than a reflex test.
Dracula's three forms
First form: move to the side of the room with the light and the bats, wait for Dracula to appear, then jump and hit his head. Stay close, so you can break his attack.
The second form looks like a sorcerer version of Death. He sends fireballs along the ground, and you jump before they reach you. Then he splits into clones. Keep track of the real one and stay right underneath him.
The third form is a demon with a mouth in the lower half of its body, and that mouth is where it takes damage. It throws blades the way Death did. After a few hits it turns blood red and spits a chain of linked fireballs that you have to jump, and it grows larger as you keep hitting it. Near the end it shrinks back to normal size, turns grey, and starts jumping at you while firing bones from its back.
Cheat codes and secrets

Expert Mode
Expert normally unlocks after you beat the game on Normal. To skip that, enter this on the title screen:
UpUpDownDownLeftRightLeftRightBA
A sound confirms it. Expert also adds a screen to each hero's ending: John strikes an action pose, Eric gets a close-up, and the credits close with "Congratulations! You are master of the Vampire Killer." Easy goes the other way. In this version both endings play for three seconds before the credits roll, so a win on Easy barely shows you anything.

9 lives and unlimited continues
This code takes more steps than the one above, and it's the one worth learning, because it unlocks Expert too.
Go to Options, set BGM to 05 and SE to 073, and play both. Press Start to return to the title screen, let it fade back to the "Press Start" screen, and press Start again. With the menu on screen, enter:
UpUpDownDownLeftRightLeftRightBA
The game chimes, and the Options menu now offers both Expert and 9 lives.
With this code active, continues stop being a limit as well. When you run out, press Reset and start the game again: you begin on the same stage where you lost.
The two sound test numbers hide one more trick. If BGM is still on 05 and SE on 073 when you leave Options and start a game, then once your weapon is fully powered up, music from the older Castlevania games plays, including "Vampire Killer" and "Bloody Tears". It lasts until you get hit, which is as good a reason as any to stop getting hit.
Stage passwords
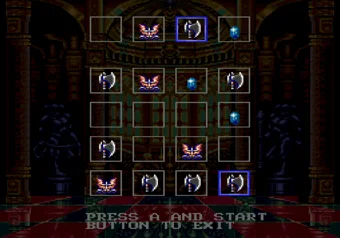
The game gives you a password after every stage boss: a four-by-four grid built from four symbols, empty, axe, bird and jewel. Enter the grids below row by row, top to bottom.
A password only gets you to the stage. Your weapon level, jewels and score reset, and your sub-weapon is gone, so stage 5 with a basic weapon plays very differently from stage 5 reached the long way, with everything powered up.
Stage 2
Empty  Axe    Bird  Empty
Bird   Empty  Bird  Empty
Jewel  Empty  Bird  Axe
Axe    Empty  Axe   Axe
Stage 3
Axe    Bird   Jewel  Axe
Empty  Empty  Empty  Jewel
Axe    Empty  Bird   Empty
Bird   Axe    Axe    Axe
Stage 4
Empty  Bird   Empty  Bird
Bird   Empty  Bird   Empty
Axe    Empty  Bird   Empty
Axe    Empty  Jewel  Axe
Stage 5
Axe    Axe    Jewel  Jewel
Empty  Empty  Empty  Jewel
Empty  Bird   Bird   Jewel
Bird   Axe    Jewel  Axe
Stage 6
Axe    Axe    Empty  Jewel
Empty  Bird   Empty  Jewel
Empty  Axe    Bird   Jewel
Bird   Axe    Empty  Empty