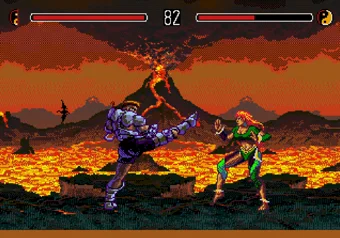
Special moves have no quarter-circles
A special is either several buttons pressed at the same time, or a charge: hold back or down for a moment, then press the opposite direction together with an attack button. Slash shoots a claw across the screen by holding and then hitting +O, and no amount of Street Fighter muscle memory will produce it. Nothing rolls.
The second half of the rule is the one that costs people matches. Each special is tied to one specific button. If a move is listed on O, it will not come out on U or I, and there is no "any punch" shortcut anywhere in the roster.
The six attacks split into two rows of three. U is a straight punch, I a lunge, O a swing; J snaps, K thrusts, L is a wheel kick. Light attacks are quick and weak, heavy ones hit hardest and leave you standing in place afterwards, which is where most rounds get thrown away.
Blocking is directional: hold away to block high, down-and-away to block low. Throws want you standing close, pressing toward or away plus I or O, and they cannot be blocked or escaped at all, so they're the answer to anyone who sits behind a guard. Take several hits in a row and you go dizzy, which hands your opponent one free attack.
Give the Practice Sphere ten minutes before your first real match. It exists so you can aim at the head, mid and foot zones until hitting the zone you actually meant stops being luck.
Special Skill activation
Press all three buttons of one row together and your fighter's Special Skill comes out. Both rows work, and they give you two different moves.
- Punch row: U+I+O
- Kick row: J+K+L
These are not filler moves, which is why the input is worth learning first. Blade's punch row raises a Personal Shield that halves every hit while it holds. Trident's kick row turns him to liquid, so he moves straight through opponents and projectiles. Midknight's kick row leaves an energy field, and anyone who touches it loses Inner Strength for the next 40 seconds. Xavier's punch row throws a ball that turns your opponent into a randomly chosen character, though if it gets reflected back he wears the new face for the rest of the match. Jetta breaks the pattern: hold the punch row for about a second and she Phases into double movement speed, which runs out on its own or the moment something connects with her.
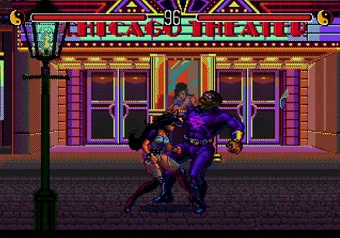
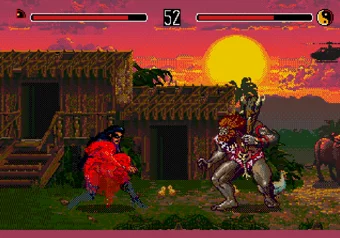
Shadow, pictured above, has the two best skills in the game and the pair most likely to catch you out. One row drops her into Shadow Mode, where she keeps attacking for five seconds without taking damage; the other is a Smoke Screen that reappears her right on top of the opponent. Press one row, then the other, and settle which is which before the match where it matters.
On an original three-button pad you only ever had one row under your thumbs, and START swapped which one, so reaching the other skill meant a menu press in the middle of a fight. Playing online in the browser puts all six on the keyboard at once, so both skills stay one press away for the whole match.
What happens when the Yin/Yang runs dry?
The Yin/Yang symbol sitting next to your health bar is your special-move account, and it is separate from health entirely. It refills on its own, slowly, while you get on with the fight. Every special charges a different amount against it, so leaning twice on one expensive move can leave you holding a full health bar with no way left to threaten anybody.
You have two ways to manage it. Retreat into a defensive shell and let the meter climb, which costs you ground and clock. Or go after your opponent's account instead: the Insult is a taunt on U+O, it deals no damage, and it drains their Inner Strength while leaving you open for the whole animation. Between two humans that's a real read. Against the CPU it's usually just a free hit for them.
Then there's the part that isn't fair. Contest mode won't let you switch the Inner Strength bar off, and the CPU keeps throwing specials long after its own meter has emptied. Your budget is real, its budget is scenery. Fight it accordingly: bank your meter for the moments that decide the round rather than spending it to look busy.
Overkills: the stage does the killing
There is no button for an Overkill. You end the round with the loser standing on one particular patch of ground, the life bars disappear, and the era takes over from there. Every stage has one except the Eternal Champion's Chamber, and in most of them the center of the screen is the spot you want. Slash's stage is the exception, so don't write the whole system off after failing there first.
Which one you get depends on the stage, not on who you picked. Fight in 1993 and the neon does the work no matter which two fighters are on screen. Every stage belongs to one character's era, so what follows are arenas, not characters:
- 50,000 BC, Slash's stage: a Tyrannosaurus eats the loser whole.
- 110 BC, Trident's stage: carnivorous plants drag them under the water and tear them apart.
- 1692, Xavier's stage: finish them at the edge of the fire and they burn at the stake.
- 1899, Jetta's stage: an earthquake splits the ground open and swallows them.
- 1920, Larcen's stage: land the finish in front of one of the doors and a drive-by does the rest.
- 1967, Midknight's stage: drop them in front of the bull at the side of the screen, then a Huey napalms the corpse.
- 1993, Shadow's stage: at the edge of the second light from the left, the neon electrocutes and vaporizes them.
- 2030, Blade's stage: stand right beside the exhaust fan and finish with a heavy attack.
- 2345, RAX's stage: put them down in the middle of the floor spotlight and the robots sweep up the pieces.
Positioning is the whole difficulty, and it works against you, because you spend the round steering someone toward a spot instead of just beating them. Set up a Fight match with a long round timer and practice there, since some of these spots take a few tries to pin down. Trying to walk an opponent into a fan during a Contest run is a good way to lose a round you had already won.
Why Contest mode punishes you twice
Eight opponents, then the Eternal Champion. Lose a match and you don't simply retry it. You drop two places back down the ladder and have to beat the previous opponent again before the one who killed you will even face you. One match you throw away costs you two fights you had already won, and the game is hard enough on its easiest setting that this happens to everyone.
The last fight ignores the rules the rest of the game taught you. It's a single round, but the Champion has five separate forms, and beating one only hands back part of your health before the next arrives. His Inner Strength never empties, so the one restriction you've been budgeting around all game doesn't apply to him at all. Lose here and it's over, with no continue and no way back into the ladder.
So the eight fights are your preparation. The real match is the ninth. Finish them with your meter as full as you can manage, and know one Special Skill for your character cold. Save the experiments for Fight mode. Your character's epilogue, the one that shows how they avoided the death history handed them, sits behind all five of those forms and nowhere else.