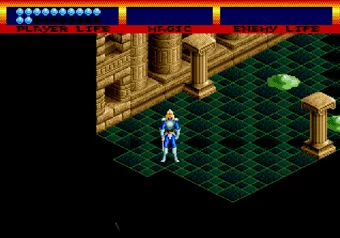
How to solve the four orb rooms on B2
B2, the second basement floor of the dungeon, is where Light Crusader stops holding your hand. Four sealed rooms, one elemental orb behind each, and the Gold Key you're handed only opens the doors. The puzzles inside are yours to crack, and guessing them blind is where most players quietly give up. Here is every answer.
Green Orb. Step on the colored floor tiles in the order Red, Yellow, Green, Blue. If you gathered the five scroll pieces scattered around the floor, the finished scroll says the same thing as "Red = 1, Yellow = 2, Green = 3, Blue = 4".
For the Yellow Orb, line up the four moon statues reading from the orb toward the door: Star, Semi-Moon, Black Moon, Full White Moon. The sign mumbling "Penumbra..." is the only hint, and it earns its reputation for being useless.
The Red Orb needs the Music Box hidden elsewhere on B2. Strike the tuning prongs in the pitch order the box plays: Down, Left, Right, Up, Left, Right, Down. Skip the box and you are matching a seven-note melody by ear with nothing to compare against.
The Blue Orb sits in the compass room. Aim the giant compass North, East, West, South, and the man you free there blurts out "N.E.W.S." before you can ask anything, which is the whole solution.
Bosses you can't beat by swinging harder
Most fights in Light Crusader reward patience, but three of them will convince you the game is broken until you know the trick. None of them care how sharp your sword is.
The Dragon (B1)
It cycles through three attacks (dropping on you, a fireball barrage, a wing flap) and then swoops across the room. That swoop is your window. Jump and slash its neck or head as it passes, and if you time it right you can land on the thing and squeeze in several hits before it shakes you off. Learn this fight properly, because the Dragon comes back on the fifth floor in Ice World and it does not get any friendlier.
The Invincible Armor (B4)
The Light Crusader trial hands you a floating suit of armor that shrugs off every sword swing, every jump attack, and every spell. That is not a difficulty spike. It's a puzzle. An invisible controller moves the armor around, and it casts a shadow on the floor that tracks with it. Ignore the armor entirely and hit the shadow. Clear the trial and you walk out with the Light Crusader sword the whole game is named after.
Ramiah, the final boss (B6)
Bloodroke throws away his own life to wake Ramiah, who floats there clutching the four orbs you spent the game chasing. You can't touch him while he holds them. Jump up to the platforms along the north wall and use indirect jump attacks to shatter all four orbs first. Only then does he become vulnerable, so stand on his leg and jump-slash his head while dodging his Thunder, his laser, and the occasional Judgement. If your Earth element is maxed, spamming Earthquake on every jump chips him down almost as fast.
Getting through B3: the goblin costume and the IRON GATE
B3 is a goblin town built on forced labor, and it locks you out in two different ways. The first is social. Find the Costume on this floor, wear it, and the guards stop attacking and start opening locked doors for you, disguised as one of their own. It's also your ticket into the fighting tournament in the east corner.
The second lock is the IRON GATE, and it stumps people for one very deliberate reason: the floor spells out "IRON GATE" in giant letters, so everyone assumes that's what they're meant to step on. It isn't. The Stone Tablet you carried up to the Princess told the story of King Garriott and ended on "never forget the name of King Garriott" as a straight hint. Walk the floor letters to spell GARRIOTT, not IRON GATE, and the door down to B4 opens.
The magic system is the whole game
Four elements (Air, Fire, Earth, Water) combine into fifteen spells, and picking the right combination is the gap between a fair fight and a hopeless one. Water on its own heals you ten health a cast, which is your lifeline in the early floors. Air and Water together freeze an enemy solid. Air and Earth throw a lightning bolt that drops Shield Guards from across the room before they can raise a shield.
Two spells you cannot skip. Turn Undead (Air, Earth, Water) is your answer to skeletons: normal sword swings, jump attacks, and fireballs all pass straight through them, so without it you are simply stuck. Judgement stacks all four elements into unblockable damage against everything on screen, and it's what you'll lean on for teleporting mages and your own cloned Davids. Each element caps at 99, and the "four elements" room in Ice World on the fifth floor is where you go to top all four back up. The Green Potion refills them instantly if you'd rather buy your way out.
Half the fun of playing Light Crusader online is that you can pause, dig through combinations, and find out what Confuse or Needlecrack actually do without spending a real run on the experiment.
Items and upgrades worth going out of your way for
A handful of finds turn Light Crusader from a grind into something manageable, and the game does a poor job of telling you they exist.
The Sextant is the big one. It's a portable teleporter that warps you instantly to any teleport room you've already visited, which matters enormously in a dungeon this sprawling. It's tucked away on B2 on the route to the yellow orb: in the room with rock columns and a corpse holding a scroll piece, strike the two joined ice columns in the corner to shatter them, and the switch behind them opens the passage to it.
Keep a Pendant equipped at all times. When David dies, it revives him right at the entrance of the room he fell in instead of dumping you back at a save point. Shops sell them for 1100g and enemies drop them, so there's no reason to walk into a boss without one.
Two more worth the detour. The Gold Armor is the best armor in the game, and it drops from the killer lily pads (Lillipads) floating on the water on B2, so hit them with jump attacks and hope for the roll. And carry Steak instead of Red Potions: food heals David automatically the moment his health drops low, while potions just sit in your bag until you manually use them, which makes a stack of Steak a safety net a Red Potion can never be. While you're at it, crack open every chest for Maximum Life upgrades that permanently extend your health bar.
Test, Test2 and debug modes
Treasure left three developer menus buried in the pause screen, and the payoff at the end is a warp-anywhere debug mode, genuinely handy if you're stuck or want to drop back onto a floor without replaying it. You unlock them in order.
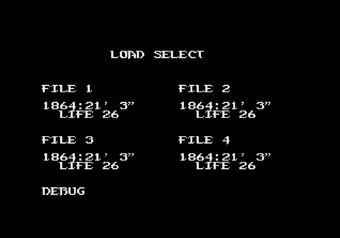
Unlocking all three
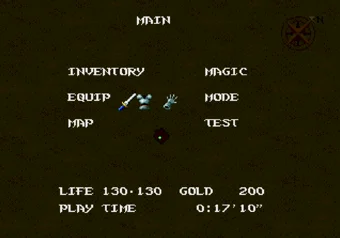
Test Mode comes first. Pause, open MODE, uncheck every item, then press six times. A test menu opens with a sprite viewer, sound test, and the game's text messages.
Test2 Mode builds on it. With Test Mode active, pause again, enter the new TEST option, and press LLLL. Now you can browse rooms, error screens, and system info.
Debug Mode is the reward. With both modes on, keep dying until the Load Select screen appears, and a new DEBUG option is waiting. From there you can jump to any part of the game and pull debug tools straight out of your inventory.