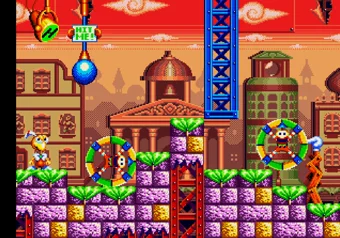
Cheat codes
All three codes go in on the title screen, and all three start with the same four buttons. Headdy says "Nice!" when an entry works, so you always know whether it took.
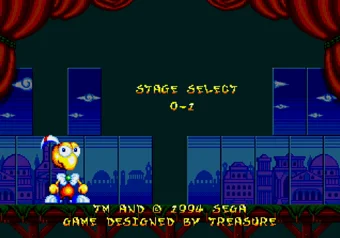
How do you open the Stage Select?
Press Enter once, leave the cursor on "Start Game" and enter SpaceLK. After the "Nice!", press Enter again and pick any scene. This is the code worth remembering: it lets you drill Twin Freaks or Dark Demon as many times as you need without fighting through everything in front of them first.
Head Check and the one-hit mode
Put the cursor on "Options" instead, enter the same five buttons and press Enter after the "Nice!" to open the Head Check, a screen where you can look through all of Headdy's animations. It won't help you win anything, but it's fun to flip through.
The third code is for anyone who finds the overseas version still too soft. Put the cursor on "Start Game" and enter SpaceL,HoldK+Enter. The last two buttons stay down: hold the first one through Headdy's "Nice!", then add the second, and let go of both only when the Opening Demo appears. From then on a single hit kills Headdy.
Which heads to take and which to walk past
Headcase cycles through his heads, and you get whichever one is showing when your throw lands, so wait for the one you want instead of hitting him on the first spin. Most heads come off again with L. Pin Head doesn't (you swap it at the next Headcase), and neither does Head Trip.
The ones worth waiting for
Slammer Head doubles your damage, breaks the blocks marked with a hammer and turns up in almost every scene. Anything tougher than a basic enemy is invulnerable for about a second after it's hit, so each hit has to count. That makes Slammer the default pick for bosses.
Bomb Head is stronger still. K throws it, it kills ordinary enemies outright and takes eight points off a boss. It also has a five-second fuse, and if it's still on Headdy's shoulders when that runs out, he dies on the spot.
Ticker Head stops time for a few seconds, bosses included. Frozen enemies still hurt if you walk into them. Lotsa Heads throws three heads in a spread and War Head sprays shots in all eight directions. Neither adds damage per hit, but both still grab Hangman, so you lose nothing by carrying them through a climbing section.
Heads with a catch
- Pig Head fires homing shots from its nose while you hold K, but it can't grab Hangman or hit switches.
- Vacuum Head sucks in enemies and items from about two screens away. It does nothing to bosses and can't grab Hangman either.
- Protector Head circles Headdy with fireballs that hurt enemies. Despite the name, they don't stop bullets.
- Empty Head makes him immune to most damage, though not to bottomless pits.
- Sleepy Head puts Headdy to sleep for about five seconds and refills his health completely. Anything that touches him wakes him up and hurts him, so take it only when the screen is clear.
- Super Head doubles his speed, jump height and throwing range, with no extra damage.
- Head Trip leaves him crawling, unable to jump and unable to use his head for anything. Stay away from it on the Headcase in Scene 9-1, where the screen keeps scrolling upward and a Head Trip means certain death. In Scene 8-3 the "DON'T SHOOT" targets hand it out too, and they mean it.
How do you climb a wall with Spike Head?
Spike Head sticks to walls and ceilings, but climbing a wall takes a rhythm. Throw diagonally up into the wall, let the head pull you up, and the moment it lets go, throw diagonally up the other way. Repeat until you're at the top. Only one spot in the game requires it. Spike Head also gives you the fast route in Scene 8-1: cling to the ceiling above the giant missiles and collect the 500s up there. Pin Head is the slow, safe alternative, letting you hide in potholes on the floor.
Flying heads in Scene 6
All of Scene 6 is a shooter. You pick one of three flying heads, and after that you can only change by collecting icons. Rocket Head fires a laser straight ahead that goes through enemy force fields. Air Head shoots in three directions and is the only one that can turn and fire backwards. Feather Head has the widest spread, though its birds drift downward. All three do the same damage per shot. Rocket Head is the one to take, because a laser is the only thing that gets past Boy Face's hand at the end of the scene.
How much punishment can Headdy take?
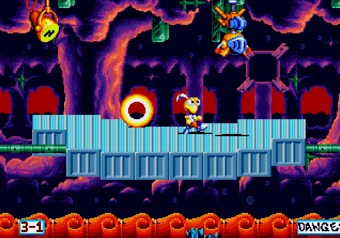
The spotlight in the top-left corner is his health. It starts green and runs through yellow, orange and red to black while the "H" in the middle shrinks. At black you restart the level. A full spotlight holds 16 points.
Falling off the stage isn't fatal. Headdy bounces back up from the bottom of the screen, you steer him onto a platform, and it costs two points. It only kills if your health was already that low. What does kill instantly is getting squashed between something solid and the scenery, and the Twin Freaks fight is built around exactly that.
A banana refills eight points, half the spotlight. At orange or better that's a full refill. Eat one while the light is flashing red and you only climb back to bright yellow.
Where do continues come from?
You start with none. When a Keymaster is destroyed it scatters debris, red blocks marked with a "T". Collect 13 of them and a voice announces "You've got another try!", and the next Game Over screen will offer you a continue. Nothing else in the game gives you one, so chase down every block after a Keymaster fight, even with the spotlight in the red.
Keymaster fights, part one
Keymasters get their own spotlight on the right side of the screen, marked "E". In these three fights Beau turns up to point at the weak spot. Watch him before you commit, because throws anywhere else are mostly wasted.
Mad Dog (Scene 2-3)
The first Keymaster spends the fight jumping off screen and coming back with a surprise. When it jumps, an arrow appears; stand well away from it. What it brings down decides your next few seconds. A basketball bounces around and can't be destroyed, so just dodge it. A huge bomb hurts you if you're standing too far right. A caterpillar takes three hits or blows itself up, and an egg hatches three unicycle riders. Sometimes it brings Bino instead: smash him twice, or once with Slammer Head, for a secret bonus point. Between drops, go for the tail.
Wooden Dresser (Scene 3-4)
By far the weakest Keymaster. It cycles through three costumes, and in each one Beau points at pieces you have to knock off in order before the heart underneath is exposed. The order is random every time, so follow Beau instead of memorizing. At the start its spotlight is purple and nothing hurts it.
The dragon suit breathes a stream of fire, and War Head handles it well. In the ballerina outfit the clothes themselves hurt on contact, which is a good moment for Ticker Head. The robot suit fires from its chest, reaches for you with a grabbing arm and stomps to bring debris down. One warning: now and then it puts on a Bino head, and breaking it gives a secret bonus point. That can happen twice in one fight, and when it does, the game sometimes freezes as the battle ends.
Spinderella (Scene 5-4)
A floating ball with extendable arms that punches hard enough to bury its hands in the floor. While they're stuck, attack the battery on its back. A sound gives each punch away: when the arm on your left comes at you, move right, and when it's the right arm, move left, keeping clear of the spikes either way. Partway through, it rotates the arena so Headdy fights from the background with the boss's body blocking half the view, then switches back. Bino runs in on the second cycle. Knock him off the screen for a secret bonus point.
The last Keymasters and Dark Demon
Baby Face (Scene 6-4)
There's no weak point here, so shoot the face. Its slow energy balls are easy to avoid if you hang back on the left (on the right if you took Air Head). Each time it drifts to the centre a new face is coming, so get into the top-left corner. Boy Face holds up a hand that blocks every shot except a laser and fires static in eight directions. Man Face drags a banner and fires laser bolts. Grandpa Face grabs you, which looks like the end but isn't: he dies before he can finish you off. Keep shooting him to the last and his face peels away to show Bino tied to a pole. Shoot Bino for a secret bonus point.
Gatekeeper (Scene 7-1)
The first half is a distraction job. Heather needs to toss the keys into the basket on the Gatekeeper's back, so stand on the side opposite her and move when it swings back to ram you.
Then Nasty Gatekeeper grabs Heather and the real fight starts. It swings its claw and launches it at your head; hit its face when it starts dropping bombs. It can't be hurt while its hand or Heather is in front of its face, and hitting Heather is worse than a miss: it triggers a punishing attack you can't avoid, even with Empty Head. Now and then it throws its hand off screen and brings back Bino or Headcase. There are two sensible ways through. Keep renewing Empty Head from Headcase and grind it down, or take Bomb Head and drop it at its feet twice. The bombs are much quicker.
Why is Twin Freaks the hardest fight?
Twin Freaks is harder than Dark Demon, and it isn't close. The head keeps advancing through narrow passages full of spike beds, and it has two moods. Green, it's slow, fires enemies from its ears and can be hurt in the ear. Red, it's fast, invulnerable and crushes anything in its way. Smashing the switches that hang in mid-air changes its colour, and your whole job is to keep it green. The rhythm that works: hit the ear nearest you, jump to the platform under the switch, throw diagonally left for another hit, then hit the switch. Green is also when most of the spike traps come out, so staying safe from the head doesn't make you safe.
You don't have to win this one on patience alone. Survive until Headcase shows up, take Slammer Head or Lotsa Heads, and throw as fast as you can.
Dark Demon (Scene 9-3)
The colour of the orb in Dark Demon's hand decides his next attack, and before it comes a ring of heads circles Headdy for you to choose from. He can only be hit while his body flashes blue, once per flash, so Slammer Head's double damage counts for more here than anywhere else in the game. When you play online here, press Save before the fight: the emulator keeps one save per game, and Load puts you back in front of him with the lives you had.
- Pink: pumpkin creatures jump and fly at you. Take War Head, or Pig Head or Super Head if War isn't offered.
- Green: spike men rise from below. Pin Head lets you hide under his cloak, and Slammer Head is the only head that destroys them.
- Blue: projectiles along the ground plus a barrier you can break. Super Head or Pin Head.
- Orange: a wall comes down with one safe gap, three more if you're wearing Pin Head, and the gaps shuffle every time. Unlike crushes elsewhere in the game, this one costs a lot of health but won't kill you outright.
- All colours flashing: a huge blast that takes almost half your health. Only Pin Head gets you out of it.
The code after the credits
Beating Dark Demon isn't the end. After the credits a keypad asks for a four-digit code, and the code changes every playthrough. The only way to learn it is the Intermission bonus game: each win shows you one digit to remember, so you need four wins. The game offers six Liberty Heads, and each bonus game asks for five more shots than the last one and throws more bombs. The early games are the ones you can't afford to lose.
Where are the six Liberty Heads?
- Scene 2-2: the Headcase next to the second ball, just before the steep slope.
- Scene 3-3, The Green Room: the Headcase right at the start, the same one that has Sleepy Head.
- Scene 4-2, Mad Mechs: the first Headcase.
- Scene 5-1, Go Headdy Go: offered just before Trouble Bruin chases you up the tower.
- Scene 7-1, Headdy Wonderland: the first Headcase again.
- Scene 8-3, Fun Forgiven: past the Penguins, on a ledge you can't reach normally. Hit a Penguin to freeze it and use it as a step. This is your last chance.
How do you win the bonus game?
Two machines at the bottom fire basketballs and the odd bomb, and you head the balls up into moving hoops. Only the Star hoops count. The Key hoop destroys one of your machines, so never aim at it. The Basketball hoop makes things busier, and the Slow hoop (marked "1/4") buys you a few calmer seconds. A ball that touches the floor turns blue and is dead.
Work one ball at a time and take them from the right-hand machine, because the left one always blows up first. Shoot straight up and avoid diagonal shots; for the upper row, jump and hit upward. And keep your finger off L: it cancels the Liberty Head and ends the game on the spot, with no digit. You also lose if both machines are destroyed or the bombs take too much of your health.
The secret boss
Enter the four digits and you get one more scene, with infinite lives. Two Hitmen throw money in a set pattern, and the money hurts: three hits and you're dead. Then comes the boss. Stand at one side, hit him, and run to the other side to get away from his homing money.