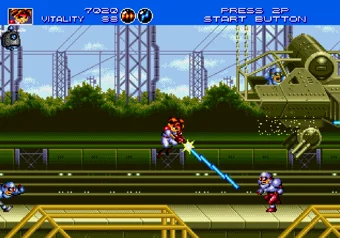
Moves and when to use them
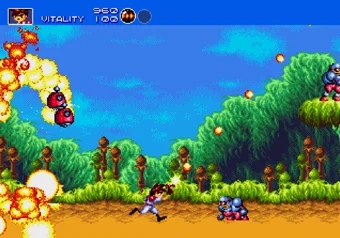
B fires, rapidly if you hold it, and grabs anyone you're close to. C jumps and A switches weapons. Most other moves mix those with a direction, and the power slide is the one that takes practice.
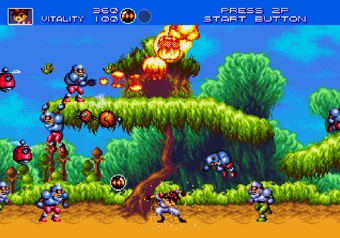
How do you do the power slide?
LeftDownRight,Right+B
That's the input when you face right, so mirror it when you face left: roll from behind you, through down, to the front, with B on the last press. You have to be on the ground, and the timing is fussy. Press too early or too late and the move won't come out.
Save it for something you can finish, because you trade safety for more damage than the plain slide, Down+C, can do. On the last stage it also breaks stacks of blue crates quicker.
The rest of the move list
| Move | Input | What it does |
|---|---|---|
| Slide | Down+C | Gets you through enemies fast and hits harder than you'd expect. It can be blocked. |
| Throw | B next to an enemy, then a direction | Aim it anywhere: all eight directions are open, on the ground or in the air. Most enemies can be grabbed, and so can skull bombs. |
| Block | B+C | Helps against some attacks only, so don't lean on it. |
| Wall Bounce | C in midair beside a wall or the edge of the screen | A quicker, taller jump that also hurts anything in the way. |
| Body Splash | C in midair, FREE SHOT only | Risky on the higher difficulties, where laser shots can juggle you during the extra airtime. Elsewhere it's a solid hit that also outdistances a plain jump. |
| Jump Kick | C in midair while rising, FIXED SHOT only | Same deal as the Body Splash. |
| Drop Kick | Down+C in midair, FIXED SHOT only | The Jump Kick's downward cousin, and the fast way onto anything below you at an angle. |
| Hang | Down+C on a platform | Lowers you under the platform. Either stance can fire in all eight directions from here while you stay still, and left or right moves you along hand over hand. |
| Flip | Up+C while hanging | Invincible while the animation plays, so you can go straight through a laser. It also counts as an attack. |
| Shimmy | Hold B and tap Up repeatedly | How a Lightning weapon reaches what sits between a horizontal and a vertical shot. |
The throw is the move to build your game around. Aim one soldier at the others and several go down together, and plenty of bosses can be grabbed too: Orange can lose up to about 400 points from one throw onto his helicopter. Learn the Wall Bounce next: it gets you clear of boss attacks, and the edge of the screen counts as a wall. And let go of B before a long gap, since firing shortens your jump.
Which is better, FREE SHOT or FIXED SHOT?
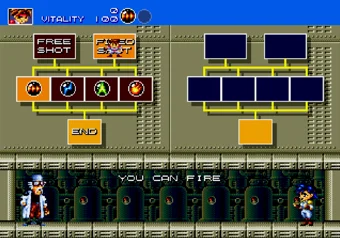
FREE SHOT looks like the obvious pick until you need to hit something below you. Its downward shots only exist in midair or while hanging from something. On the ground you get left, right and the two upward diagonals on the move, plus straight up when you stop. It does keep firing forward from a crouch, so you can duck shots from ground enemies and stay in the fight. Chaser Lightning is a good match, since it locks onto a target and leaves you to concentrate on dodging.
FIXED SHOT's weak spot is the crouch, which only fires into the ground. I'd still pick it, because standing still stops being a drawback once you quit shooting on the run: find a safe spot, fire, move to the next. Exploding Fireball, Chaser Fireball and Mega-Bolt all suit it. It also makes Swapping Reg on The Flying Battleship close to a free win: get on one of its feet as it arrives and use its jump to reach the cable along the top, where you can shoot for as long as it takes without being hit.
All ten weapon combinations
You carry two weapons, and A cycles from the left one to the right one to both together. The combination is active when neither weapon is flashing. Starting with Force is the safe choice: whatever you pick up next combines into something good, and it holds up alone until then. Expert is where most Chaser combinations stop working, which is a shame, because below Hard they're the easiest way through the game.
| Pair | Weapon | What it's good for |
|---|---|---|
| Force + Force | Double Fireball | Your crowd clearer, thanks to a wide spread, plenty of speed and strong shots. One small target at an angle is the job it's bad at. |
| Force + Lightning | Rapid-fire Lightning | In FREE SHOT this is the answer to diagonal targets: hold the stream and shimmy. Groups melt under it too. Anything behind you is the catch. Let go of B first, then turn, because a shimmy makes your aim painfully slow to come round. |
| Force + Chaser | Chaser Force Beam | The beam curves toward the enemy, though not far enough to excuse bad aim, and you get less spread than Double Fireball. Save it for bosses, since crowds are where it struggles. |
| Force + Fire | Exploding Fireball | It crawls, but it's among the top three for damage and the weapon to bring to the final boss. You control the blast: letting go of B sets off a shot that hasn't hit anything yet, and that splash is what wrecks groups. Suits FIXED SHOT. |
| Lightning + Lightning | Mega-Bolt | A thin beam makes this one hard to use on the move, which is why it belongs in FIXED SHOT. Aim well and it's quick and strong. |
| Lightning + Chaser | Chaser Lightning | The pick below Hard, because it does your aiming: one target at a time, each held until it's gone. Watch what it chooses, since inanimate objects and undamageable boss parts can waste its fire. |
| Lightning + Fire | Lightning Saber | Nothing hits harder, and nothing has less reach. Stick it right into a boss and it destroys most of the shots coming at you. |
| Chaser + Chaser | Star Chaser | A bit too weak for Hard and up. Below that, it's excellent. |
| Chaser + Fire | Chaser Fireball | Second only to the Lightning Saber for power, and the fiddliest weapon here. Steer it by holding B and using the direction buttons, or tap B once and let a big flame home in by itself. It burns through most projectiles. Use FIXED SHOT, because steering in FREE SHOT also walks you around, sometimes into a pit. |
| Fire + Fire | Ultra Flamethrower | Plain Fire with twice the reach, and the jet stays strong and steady. Your aim still matters after you let go of B, since the flames already in the air fly off that way. |
Items, vitality and continues
Walking over an item won't pick it up. Stand on it and press Down+B, which also works in the air if you're over it. A new weapon lands in the left slot and bumps one of the two you're carrying, so check what combination you'll end up with before you grab it.
You start with 100 vitality, and your stats begin to flash once it drops below 50. Vitality-Up items come out of boxes, machines, robots and electronic ducks when you shoot them. The Sphere Bird is the better source: enemies thrown into it knock HP Spheres loose. Watch for the orange flying machine as well, and jump at it. One weapon or vitality item is all it gives if you let it go, and as many as three if a physical attack lands first.
The fifth stage has the best spot for this. A row of three barrels marks it, the last one hollow with a soldier inside. Walk slightly past them, then keep nudging left in short steps, and a Sphere Bird should arrive from that side. The enemies on that stage never run out, so you always have something to throw, and five spheres is a realistic haul.
What happens when you run out of vitality?
You get a Continue screen and can say yes as many times as you like. The price is your weapons: you come back with only the one you picked on the equip screen, and the combination you built is gone. When you play online here, the Save button is better insurance. Press it before a fight you keep losing, and Load puts you back at that moment with the weapons you had. There's one slot per game and each Save replaces the last, so don't overwrite a good position with a bad one. Saves stay in this browser on this device.
Which stage should you play first?
Below Hard, start with The Ancient Ruins, where the enemy waves are easy and Papaya Dance and Bravoo Man are simple mid-bosses. On Hard and Expert the order decides how much vitality you bring to the worst stages, because clearing a stage raises your starting vitality by 20, up to 220. The Ancient Ruins and The Underground Mine are really nasty on Expert, so leave them for last and take an extra 40 and 60 into them.
| Order | Stage | Weapon plan |
|---|---|---|
| 1 | The Strange Fortress | Force, upgraded to Double Fireball |
| 2 | The Flying Battleship | Chaser Lightning |
| 3 | The Ancient Ruins | Lightning Saber |
| 4 | The Underground Mine | Double Fireball again, with Rapid-fire Lightning ready for the boss |
The Ancient Ruins, section by section
Sprint right through the village. Leave the huts standing, since the points for blowing them up don't repay the stop. Papaya Dance is a matter of parking yourself under it and firing upward, with two interruptions: an Ant, which should die the moment it appears, and a big clump of balloons, which is what your slide is for. The pyramid is another sprint: two steps per jump all the way up, past the enemies and even the Sphere Birds.
Why does Bravoo Man get its vitality back?
Because it got to finish Spinning Driver, which refills all its vitality. Green arms and a lift-off are the warning. Otherwise it's an easy fight: a jump attack through it whenever it gets close, a run to the far side of the screen, and more shooting as it comes back.
The slope, the forest and Pinky Roader
When the pyramid falls apart you end up on a big slope, and your spot is the far left. Most enemies bounce over your head from there, so you only need to fire right. Only three come up the ramp close enough to need a throw: hold Up and jab B for those. By the forest you want a Lightning Saber combined, because charging through is the plan.
Under Pinky Roader is the safest place in this fight, because a shimmying Lightning Saber pointed straight up cancels every Hitman Shot from the elder Duck Brother while it tears into the machine. Getting there takes one good moment. Its jump into the open, when the screen starts to scroll, is the signal for a jump attack and a run to the right, and you want to be waiting at the right side of the screen from the moment its Actions appear. Once you're beneath it, settle at the far right facing left. The elder Duck Brother can get behind you beside Pinky Roader's leg, which makes that spot only the fallback for when you never get under.
How do you beat Seven Force?
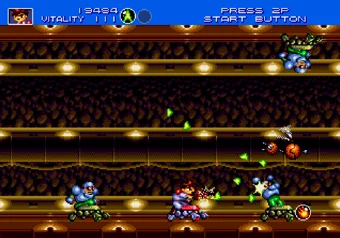
The Underground Mine itself is straightforward, so your one job is to reach the boss with Rapid-fire Lightning. How many forms you face depends on difficulty: three on Easy, five on Normal, all seven on Hard and Expert. Only the opener is fixed, Soldier Force, so you can't plan for the rest. To switch between floor and ceiling, press a direction and C twice.
Soldier Force turns lethal if you fight it from the wrong place. The right one is the floor, two cart widths or so from the right edge, where a shimmy reaches its main body and the replies are simple: a jump for the fired arm, a surface switch for the slide.
Which form is the hardest?
Probably Tails Force, and only because of one pattern. Its trip around the edge of the screen looks harmless: counter-clockwise from the top right corner, and nothing happens until the bottom left. From there forget about damage and dodge, because it keeps moving as it fires Lightning Zap, and getting caught can leave you stuck on a wall or bounced around in the air. The other two patterns barely matter. A tipped-back head mid-screen means a feeble burst you can rise out of, and for Somersault Tail, which closes in when you're at the left wall, a small move up or down is enough.
The forms that make you think ahead
Tiger Force never makes you work to land a hit, so the whole fight is about its two lasers. Stay moving for Sight Laser, which has to track you before it can fire. Trace Zapper gives you more warning. Pick your firing spot from the blue line that appears when its tail waggles: that's only the first stretch of the laser's path, and you have to extend it yourself.
Urchin Force gives you free damage in Rush And Roulette, when it sits in the center and rotates. Shoot until the rotation stops, then find a gap between the spikes that carry light orbs, and the orbs will fly past. Its dangerous move is Hyper Sonic Spin, a fast drop down one side after some bouncing from wall to wall, so keep your eyes on it while you shimmy.
Eagle Force has only Dance Dance at this point, and everything depends on slipping past its body. Two signs tell you when. Straight arms are the cue if it comes at you side on, and otherwise a bent arm with the tail on the far side from it. You'll spend the fight shuttling between the top of the screen and a bottom corner: cross, fire upward from the corner, and climb again once it dives back past you.
Crab Force is a test of your surface switching. The goal is to hang between floor and ceiling and land only for an extending wall, which takes B held down and C tapped over and over.
Blaster Force is a gift. Its gun pivots on the round part of its body and can't reach the spots directly above and below that, so park in either one and shoot until it dies.
The Dice Palace, square by square
Eighteen squares follow the start, with Black on the last one. Landing on To Start hurts less than it sounds, because every room you've cleared stays cleared. Minion Soldier on square 5 is the fight to worry about, so top up in the item room on square 2 if the die lets you.
| Square | Room | What to do |
|---|---|---|
| 1 | Valvalion | Aim only for the head while you watch for two patterns: spinning on one spot means a thrust at wherever you're standing, and a spiral to the right ends in a slam and arches back to the left. |
| 2 | Item room | Force, Lightning, Chaser and HP Spheres. |
| 3 | Timeron | Its trick comes at 10 on the timer, when time reverses and the five or so pods that burst on the floor return to the core, so remember the order they fell in. |
| 4 | Rush and Go!!! | A race against a one-minute clock, corner to corner from bottom left to top right. Finish early for more points. |
| 5 | Minion Soldier | Nothing else on the board is this tough. For his size he hits very hard, and his throw is the worst of it. Your slide is the escape when he closes in, and the crouch it starts from is also the only way to hit him. His weak clones count toward his vitality, a little each. |
| 6 | Melon Bread | So slow to attack that it can die before you ever see what it does. |
| 7 | Destroy!! | Your target is a gunship that's been switched off. Check the far left box for an HP Sphere. |
| 8 | Pit | A big bat patrols back and forth while six balls with 400 vitality each bounce around it. Shooting upward from the left side works well. Holding C as you jump into a ball lets you hang underneath it. |
| 9 | Rush and Go!!! | A throw is the quick answer to anyone in the room, and you get around by Wall Bouncing. |
| 10 | Item room | Fire, Force, Lightning and HP Spheres. |
| 11 | Phantom | His bombs are ammunition for you, so keep your distance and throw them back while you shoot. A slide means he's close enough to jump at and hurl across the room. |
| 12 | Vortex Base | The flash order of the seven globes around the room shows the path the laser from the bottom core will take. A flip carries you through the beam. |
| 13 | Curry and Rice | No guns here, so you have to make your own opening, and a jump nearby does it by setting off a flurry of slaps at the air. Each throw during that flurry is worth 100 damage, and on Expert four are enough, as long as you then stay off the head, which explodes if you touch it. |
| 14 | Abarenbou Gel | Being landed on or crushed against a wall is what hurts, and the light balls it leaves behind each hop add to the mess. The honest way is shooting from one side and Wall Bouncing away when it gets close. The lazy way is better: climb on its back early, stand off-center and crouch, and its own bombs finish it once it reaches a corner. |
| 15 | Super Gondola | The belt you stand on won't hold still, because levers shift it sideways and bombs break pieces off. Your firing spot is straight up from two or so steps to the right. |
| 16 | Item room | Chaser, Fire and two HP Spheres. |
| 17 | To Start | Back to the beginning of the board, with cleared rooms still cleared. |
| 18 | Black Beat Stepper | Black's mech, and its attacks depend on a die of its own. |
A quick route through the first Rush and Go!!!
Whatever walls and floors match the current color are gone, and hitting the orb on a square's wall moves that color along: green, blue, yellow, red, then green again. Treat the spheres in the room as enemies. Follow this route and you should finish in under fifteen seconds:
| Orb color | What to do |
|---|---|
| Clear | Punch |
| Green | Punch |
| Blue | Jump attack |
| Yellow | Jump attack |
| Red | Punch |
| Green | Punch while holding Right |
| Blue | Punch while holding Right |
| Yellow | Punch |
| Red | Punch while holding Right |
| Green | Enter the next square, then punch right away |
| Blue | Punch |
| Yellow | Punch |
| Red | Move right into the goal |
Black Beat Stepper's four attacks
Every attack starts from all the panels of one color, and the panel under the mech's left foot when it stops tells you which. A die roll decides how many steps Black takes along the panels before that.
- Red Fireball: stay at the foot of the left wall.
- Green Cutter: both lower corners are safe, if you crouch in the left one.
- Blue Cracker: every corner spits out four bombs, so keep away from all of them.
- Yellow Laser: this time a corner is where you want to be.
Keep shooting him after the fight, because the real Red Mystical Gem comes out only then, and don't touch the exploding fake he pulls from his jacket first.
How do you survive the spaceship stage?
Expert turns this stage into a brick wall, and at high difficulty you won't get far without the Lightning Saber. Nudge a direction and hold B to fix your fire that way, which turns the saber into a shield. Corners are where you get pinned, and a direction plus C gets you out: the Warp Jump, which throws you that way very fast.
Asteroids are the saber's first job, since they bounce off a blade fixed forward and do major damage if they connect. Clearing the big ships that follow isn't safe, so kill the first and slip past the others. The trick near the bottom of the level is to never see the big blue lasers at all. Sit in the top right corner and they pass off screen, just above your head. That leaves only the enemies and their shots, which a saber pointed left blocks. The yellow beams come in two sets. Enemies wait between the beams of the first set, so thread the gaps with the saber leading as you work upward. Beyond the second set, which you can jump through once a path opens, dodging is all that matters: more asteroids arrive alongside a big yellow ship, and the ship isn't worth your attention.
The Warp Jump earns its keep next. The three rings of enemies can't touch you until they turn solid, so leave before that, and warp jumps also keep you away from the enemy riding a string of asteroids until it's gone. The cannon barrage after that is a matter of dodging along the top edge of the screen.
The bosses before you board
The second Timeron and the 1000MM Gun fall to the same plan: jam the saber into them. The missile bays are all you need to watch on the gun, whose own shots die on the blade. Ignore the ship streams along the top and bottom after it, because the two cannons are the priority: shoot them straight ahead from near the front of the screen, a little high. The streams become your problem once they start crossing, and by then you want to be at the back of the screen. Time your warp for when they've nearly reached the left side, so that it takes you through both, and finish the cannon after that.
Seven Force comes back with a faster act, and Crab Force and Eagle Force are the ones to fear this time. Every form still appears, each good for one attack. Soldier Force is the reason to stay above or below it, since it keeps edging closer and firing horizontally at your level. The blind spot on Blaster Force still works.
Boarding and Core Guard System
The grunts inside have more vitality than any others in the game, so boarding is the moment to drop the saber for a ranged weapon, preferably Double Fireball. A Sphere Bird on the way gives three HP Spheres.
Core Guard System has three phases, and the first one hurts most. A quick move is enough to escape Unit of the Hammer's fall, but only when it's falling in an arc, and that depends on you never waiting directly below it. Between phases the exploding drones drive you into a corner, where you crouch with your back to the wall and save your slide for any that come in after you. Having dropped the Lightning Saber pays off against Unit of the Dragon, whose slow gas clouds are only tough on someone still using it. Against Unit of the Runner, only the low light orbs need a jump, and that stays true even when its swinging arm sends you into the corner.
How do you beat Golden Silver?
Your shots belong on the four Mystical Gems floating above the boss, because Golden Silver itself isn't the target. Every gem chips at the same damage total, so shoot whichever you can reach. Right before the fight you'll find an HP Sphere and three Weapon Spheres, your supply for Exploding Fireball if you still don't have one. Press Save once you have it, since this fight will take a few tries. If you'd rather spend your time dodging, FREE SHOT with Chaser Lightning is the fallback: it stays locked on the gems without your help.
For about two thirds of the damage you can stay in one spot, the gap between the boss's hand and body, firing straight up unharmed. The rest of the fight starts with Jewel Strike, when the gems turn your four base weapons against you.
What do the gems do during Jewel Strike?
Two of them are simple, since Golden Silver's body blocks the Force and Chaser gems if you keep it between you and them. The Lightning gem gives you a timetable, four seconds of fire and two of movement. The Fire gem is the awkward one, and its flame has to be above you before you can duck under the gem. If you throw a gem at all, make it the one attacking you at that moment.
All of this happens with Golden Silver loose, quick and hitting hard. Cornering it is the way to buy time, and it works because charges and teleports are rare by this point. Jump attacks are the surest way to knock it down.