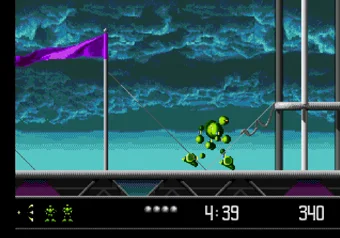
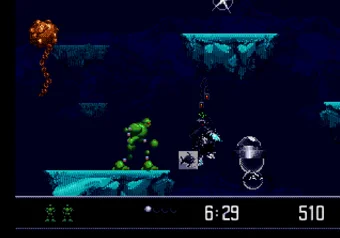
Difficulty, lives and the fact that there are no continues
Three settings sit in the Options menu: Lame, Wicked and Insane. Wicked is the one the game is balanced around. Lame hands you a fifth health orb, Insane takes one away and leaves you on three. The setting also decides how much punishment bosses absorb: the machine on the tracks in DAY 2 dies in three hits on Lame and takes more than that on everything above it.
The life count is what hurts. Extra lives arrive by score, one every 10,000 points on Lame, every 20,000 on Wicked, every 40,000 on Insane. When the last one goes, that is the run. No continues, no resuming from DAY 12, back to the start. Every stage also runs on a clock, and a timeout costs a whole life, so the boss stages with a one-minute limit are a fight against two things at once.
Fail a level and the game offers to drop you down a difficulty for free, then calls you lame for taking it. Take it anyway if you want to see DAY 16.
Weapons and morphs
The Ball Gun never runs out, but it fires one shot per press and nothing makes it faster. Everything else has an ammo count. When a weapon is nearly gone its icon starts flashing and a buzzer sounds, and at zero you drop back to the Ball Gun, usually in the middle of something.
Rapid Fire is the one you hold down, and its shots ricochet off walls and ceilings. Wave fires straight through walls. Bolo is slow but carries on through an enemy instead of stopping at the first one. Orb wipes the screen once and then it is gone, and WarHead seems to shrug it off, so saving it for the last fight is a waste. The Nucleus Shield is the odd one out: it expires on a timer whether you fire or not.
Morphs come out of televisions too. Drill opens floors, Buggy smashes through walls, Missile bursts up through ceilings, and Bomb does all three, going off when you press K or L or by itself after a few seconds. Jet gives you free flight for a while, Fish does the same underwater and slips through platforms, Parachute only slows a fall. In the drill, bomb, missile, buggy and parachute forms you can move left or right and nothing else, so line yourself up before you take the icon.
Where the first four MAX HEALTH upgrades are
A MAX HEALTH icon refills every orb and permanently adds another one. Four of them are in the first ten days.
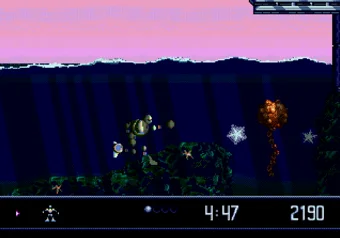
DAY 1 has the first. After the drop where one television gives the Rapid Fire Gun and another gives a checkpoint, go up through the floor, shoot the television there for a bomb, blow open the wall on the left and follow the passage. On DAY 4 the upgrade sits in a secret room on the left during the long underwater climb, and the timer is the problem: it should read around 2:00 by the time you get there, so shoot the television and get out fast.
DAY 6 is the awkward one. From the checkpoint at the top of the leftmost bamboo carrier, jump right, then boost jump in midair. Done properly you land on a small platform with the television on it; done badly you fall back down and ride the carrier again. On DAY 10, after the television that turns you into the jet, go down and slightly right, then fly all the way up, head left through what looks like solid wall and drop down the other side.
Get all four and the back half of the game stops being a series of one-mistake corridors. Skip them and DAY 14 will explain why that was a bad idea.
Boss patterns, DAY 1 to DAY 9
Sludge Barge (DAY 1)
It flies back and forth above you with spiked balls swinging from its wings on chains, so the centre of the screen is the safe lane. It opens its hatch to drop bombs, and that is the only moment worth shooting at it. The rest is patience.
The machine on the tracks (DAY 2)
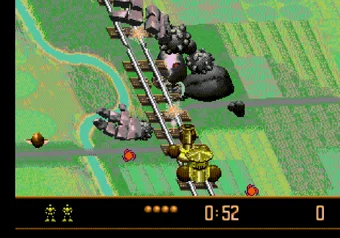
You are a train here, able to move fast or slow and fire left, right or straight ahead. The target is its hands: shoot the ones gripping the track and it lets go, then it grabs on again and you repeat. Send shots sideways every so often, because pods are firing at you from there, and jump when a hand or a shot is about to reach you.
Aurora Borealis (DAY 4)
Two forms, and the first is a gift: a bird appears in the sky, you follow it and fire, and it never does anything else. The polar bear behind it is the actual fight. It walks while shooting and occasionally rears up to fire a three-way spread. Start moving before it finishes standing up.
The robot standing in the way on DAY 5
Not a boss, but it stops more runs than one. A huge robot blocks the path and jumps when you jump, so jump, boost jump in midair, and run underneath while it is still coming down. It can only be hurt from behind; shoot the silver robot on DAY 12 from behind as well.
Clockwork (DAY 6)
Shoot the head. It answers by launching bombs upward out of that same head, so sit at the far edge of the screen, let the volley come down, and fire in the gap afterwards. If it closes on you, boost jump over it and take the other side. The exhaust from the boost damages whatever is underneath you, so crossing it costs less than it looks.
The rock fists (DAY 7)
A scrolling treadmill maze with two rocks shaped like fists trying to flatten you from above. Watch their shadows, that is where the next slam lands. The arrows on the floor set the speed: green ones pointing up keep it slow, purple ones pointing down make it race, and slow is what you want, because falling off the treadmill kills you outright. Damage is shared between the rocks, so put everything into whichever is closer and both die.
Acrobat (DAY 9)
Four blobs that keep recombining, and they cannot be damaged while they are apart. Wait for the shape. It starts as a slinky thing arcing up and down, then the same thing crawling along the ground, and you jump both. Then it becomes a walking man shape: go over it and unload on the way down. After that the pattern repeats.
Boss patterns, DAY 11 to DAY 16
The thing in the middle of the disco floor (DAY 11)
You spin on a disco floor with tornadoes wandering across it. The tornadoes do not damage you, they only shove you around, so stop treating them as a threat and you can concentrate on the floor itself. Somewhere in it is a hole you can shoot through, and the enemy in the centre is what you are aiming at. It fires laser bolts back, and the floor keeps rotating clockwise, so the hole moves and you move with it.
The blueprints: Spider Bomber, Piranha, Monkey (DAY 14)
Three drawings come to life one after another. The spaceship flies around trying to ram you and drops bombs, so fire at it and jump when it comes in. The piranha is the one that catches people out: it walks back and forth until you hit it, and after that it moves faster than you do and hits hard. Shoot it from close range and then run, because jumping over it is a coin flip, it turns quicker than you expect. The monkey climbs the walls and only drops down to shoot when you hit it. There is a television in its room as well, so pull health out of it if the piranha took some off you.
WarHead (DAY 16)
The stage is a tornado you ride upward, shooting the junk that comes at you, and then WarHead is there. Stand on the rooftops and aim at the head. The fight gets busier as he takes damage, more shots and more hand movement, but none of it is hard to read, and the safety net is absurd: fall off and you get bumped straight back to the top with no health lost. Sixteen days of no continues and the final boss is the most forgiving fight in the game.
Cheats, hidden menus and a level warp
There are no passwords in Vectorman. Nothing to write down, nothing to type in tomorrow, and with continues missing as well the game expects you to clear all sixteen days in one sitting or start over from DAY 1. Playing online here, the Save button gets you around that: it keeps one save per game in this browser, and Load puts you back where you were. The codes below are the other way, and each of them uses only K,L,Space and directions, so all of them go in from the keyboard or the on-screen buttons.
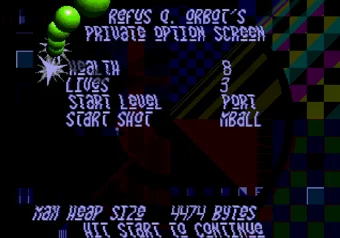
Refus Q. Orbot's Private Option Screen
Open Options from the title screen and enter KLLKKLLK. A second menu appears with four fields on it: Health, Lives, Start Level and Start Shot.
Health goes up to ten orbs, lives up to 99, Start Level covers every day plus the bonus round, and Start Shot decides which weapon you begin with instead of the Ball Gun. After you set 99 lives the counter may read X98, which is only a display problem, the game still gives you the extra life. Set the level to where you died last time and this menu becomes the save system the game itself never had.
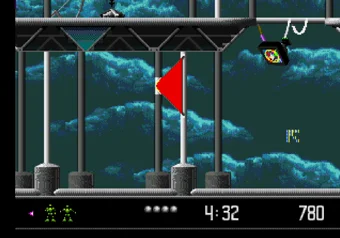
Pause codes
Pause the game first, then enter the sequence. Everything here takes effect right where you are standing.
Worth using
- Full health: KLKSpaceKKLK
- Invincibility and free movement: SpaceKKSpaceKL
- Slow motion: KSpaceK
The middle one turns Vectorman into a cursor you can steer anywhere on the screen. He takes no damage in that state and kills most enemies just by touching them. Pause and enter the same code again to turn it off.
Debug displays the developers left in
- Enemy hitboxes: KK (enter it again to cycle through the enemies on screen)
- Vectorman's own hitbox: KLKSpaceKL
- Player and screen coordinates: LK
- Player coordinates, four digits: LK
The two hitbox codes are the ones with practical use. Leave them on for a stage and you stop guessing how close you can stand to a boss.
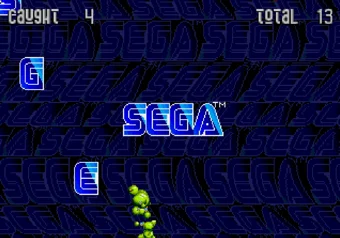
Two secrets on the SEGA logo screen
Vectorman is already under your control on the SEGA screen, before the game has started. Stand slightly to the right of the logo, aim upward and shoot. There is a television hidden up there, it drops an Orb, and firing the Orb turns the logo dark and stops the background moving.
The other one is a warp. Shoot the logo 24 times, then jump and hit it with his head another 12 times, and the letters S, E, G and A begin falling out of it while the screen counts what you catch. Between 90 and 110 letters starts you on DAY 5. More than 110 starts you on DAY 10, nine stages skipped, and three of the four MAX HEALTH upgrades with them.